Showing posts with label Creative. Show all posts

Monday, June 11, 2012

Mail Call!

Most of you can relate to this: Pintrest will be the death of me!
For my next project, I got the idea from this photo:

Isn't this the perfect idea to put outside your little one's door? You can write them notes, put some cookies in there, a small gift. The ideas are endless!
So I wanted to make one for Lilly. I found this mailbox on sale for $7 at Menards, but I'm sure you can find one at a local hardware store, or maybe even Goodwill.

I painted it a flat black, and used a tooth brush to splatter some pink paint on it for her. Then I used scrapbook letters to put her name on the outside.

And, then hang on the wall! I wrote her a little note and she just loves to put things in there to 'send' to me too.


creative. endeavor= complete

Onward.


Monday, April 2, 2012

Gallery Wall

There are so many creative gallery walls out there! I thought I would create my own (on the largest wall I have in my house).
This is what the wall looked like before:

I started by making a center piece for the wall. A monogram 'C' (with the left over fabric from my headboard).

Got my hot glue gun out and created this:


I placed the 'C' on the wall. ooooo so lonely!!!


And here is a little picture hanging tip I read about. Use this nail to put in the hook on the back of your picture. Place the picture on the wall where you want it to hang, and give it a little tap. It will create a hole for you to place your nail in. Picture Perfect Placement!


I placed on my frames on the floor first so I could create a good balance of small to large frames.
This is how it started.
I made some marks on the wall creating a horizontal 5" line to line up the bottom of my frames. Start a hangin'! 


Slowly but surly, comin' along.


And, here she is. Complete! I added a few of my daughter's art projects to create some interest as well as a few silver canvas pieces I made.


creative. endeavor = completed 

Onward.

Headboard

One of my goals has been to make a headboard. I started simple, and I may upgrade later.
I started with a canvas frame with the dimensions that I wanted, some fabric, and my staple gun. And, I got busy!


I stapled one end all the way down the length of the frame. Then I started on the other side in the middle, stretching the fabric as I moved towards the end.


 After I was done, this is what they looked like on the back.

And from the front:

Then I nailed some frame brackets to the back so I could hang it on the wall.
Not too bad for a $15 head board, hu?? 


creative. endeavor =  completed

Onward.

Accent Chairs


Since I got a new kitchen table  I decided to up-cycle my old table and chairs. So, here are the chairs before:


And after a coat of black spray paint. One, $4 yard of fabric. Quilting batting. and a piece of foam. This is what I got for a few accent chairs. It's always nice to have a few extra spots to sit, right?

I love these simple upgrades!

creative. endeavor = completed 

Onward.


Simple Art

As I was planning out my gallery wall, I decided I needed to make a few extra additions to help keep the balance. I did a quick surf through my sidekick, Pintrest. And, I liked this:


So I decided to create my own!
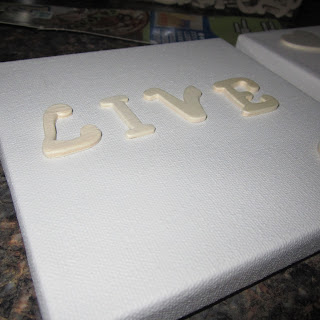
I got some square canvas from Hobby Lobby and some wood letters.
I used a hot glue gun to keep the wood in place. Make sure to draw a light straight line, in pencil, to line up the letters. 


Then, I took them to the garage to spay paint them silver to give my gallery wall some balance, and POP.
Whatta think?


creative. endeavor = completed

Onward.


Tuesday, March 27, 2012

Old Cupboard into Serving Tray

Yes, yet another Pintrest find. I have been wanting to re-due my master bedroom now that my daughter's room is almost complete. When I ran across this on www.craftynest.com I knew I had to make these for my side tables.
Here is their example:

An old cupboard, made into a serving tray. Clever, hu??
So, I took a little trip to the Habitat for Humanities Re-sell store, and went crazy in there! I have so many ideas for projects.

This is how they started. Can you read the price tag? $3.00!!!!!


Sanded and spray painted them with three coats of white spray paint. ( I should buy stock in this stuff. It's wonderful.)


Found some hardware at Hobby Lobby that was 50% off. I think I paid $2.00 for each handle.


 Nailed the handles to the tray.


I tried two different inlays for the tray. This one is a piece of scrapbook paper cut to size and fits perfectly in the center. I like this idea because then you can change the inlay whenever you want to give it a new look.


For the second one, I decided to try some stencil work. I used this stencil, and made my own design to fit the space in the tray.

 I used a combination of these two paints to give it a sheer look.


 It is more sheer than what the picture shows. But, I love how both of them turned out. These are going to be a great addition to my side tables!


Side-by-side. They each will go on a white table like this one. Stay classy.


creative. endeavor= completed

Onward.

Saturday, March 24, 2012

Hooked on Laundry

Here is another Pintrest project, and one of my FAVORITE. 

So here is my laundry room before:

(I've got to get a room divider to hide the water heater- my next purchase.)


I taped off the stripe I wanted. I did 7", and it seems to work well. Here's a tip when applying tape: wear the tape around your wrist and unroll as you need it. Then, use an old credit card to make sure the paint doesn't bleed through the tape. It works like a charm!

Anddddd, I LOVE how this turned out!!


To make sure the hooks were spaced out evenly: I measured the space I wanted the hooks to cover and divided it by the number of hooks I had. Perfectly spaced!

creative.endeavor= completed

Onward.


Sunburst Mirror

This next project was inspired by THIS blogger. So I decided to try my own version of it.

I started with a #3.50 candle base and $.69, 100 count BBQ skewers. 


Then I grabbed my glue gun. I made a circle template in pencil on the back so I had a guide to go by.


Then, a little metallic gold spray paint andddd here we have it! I added a small display mirror to the center that I had laying around from a past project.


My daughter Lilly said she wanted me to hang it in her 'play area' after I paint her table and chairs black and red (yep, that's my daughter!). 

creative.endeavor= completed

Onward.